Painting Developments

I began my painting research by looking at different images from Live Camera Girl sites, but not specifically eating fetishes.

cam

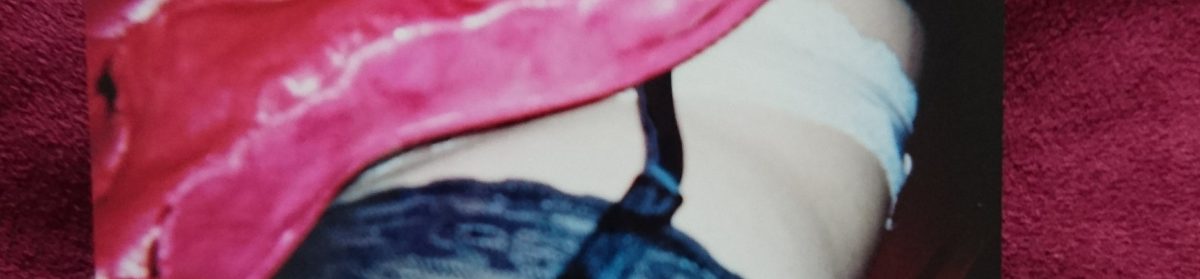
I decided to photoshop myself into them eating my breakfast sexually, and they actually turned out rather humorously. I wanted to begin generating things for what I wanted to do with these ideas by painting them, and see where that lead me. My aim during this process was to look further into how Camera Girls eating could lead to an unhealthy obsession with food, like binge eating. For a more sexual effect with these images, I used strawberry and running chocolate that have sexual connotations to them, from advertisements in particular, making the chocolate drip onto my chin which could signify semen.

I chose this image to paint because I found that I could play around with the comment section.

mecam (1)

I began by painting an MDF board a dark purple and then slowly built up the face to match the picture of me. As an end result, my aim was to emphasise the dripping chocolate and tongue touching it, as I believe this was the most sexual part. The comments are all related to eating and are sexually driven.

dsc_0032_11-1531482279

I was fairly happy with how it had turned out, as it was the first of the trio I made during this project. It took me a lot longer to paint than what I thought it would because I found it pretty hard to blend then acrylic paints. I do, however, think it served its purpose as a piece that represents where my ideas were at, which was highlighting the fetish of sexual foods and what it means to film yourself eating, being large or thin, a woman or a man, and if you make money from it or not.

dsc_0046387387602

Throughout the year, I became very interested in the idea of food as being sexual. By using emojis as the comments in the first painting, it had opened up endless possibilities for my next paintings. I think it’s fascinating that people, including me, send these emojis, whether it be as a joke or taken seriously, as a way to say something sexually. We then see these foods as something sexual, although some have always carried sexual connotations. They might have even been designed specifically to look sexual, which I also find really interesting. Most relationships are spent online at one point or the other, especially young ones, and this culture of sexting which include these emojis was incredibly fascinating to look into.

peach

While researching into fruit machines, I was really interested in using the “Chav It” machine because it included catch-phrases and interesting designs, as well as humour that I thought I could potentially use for this next painting.

chav-it

I decided to copy the outlines of the fruit machine and change it by adding a painted bit of me eating a banana from my camera girl experience and using emojis as the fruit, with comments I documented from the live stream on the side, correlating with the original image I found online of a fruit machine. I also included comments I received on my tinder profile as “Peaches”.

dsc_0017-1593302321

The end result, which is above, turned out successfully for this stage of my project, though I do feel like my painting isn’t amazing, however the context and its desired effect, I think, is apparent. It took me over two weeks to complete, and I do think it was reflected in the detail and size.

At the Get Loose exhibition;

dsc_00502031112707

The final painting was a close-up of a fruit machine, but with emojis instead of fruits, in-keeping with the theme of the series. I first sketched out a few ideas, until I concluded with this one;

dsc_0042456910637

I originally thought that making a closer version of a fruit machine might make the painting process a little quicker, but it took just as long as the first two. The amount of detail I planned to put into them was the reason behind this, due to wanting them to resemble the emojis as much as possible. The bright, animated emojis contrasted with the background being very painterly, which is what I particularly enjoyed about this painting.

At this stage, I could see a difference in my painting quality since the first one, and was very excited about showing the trio at the Get Loose exhibition I held in November with a few other students.

They were all accepted well at the exhibition by my peers and looked great in the space of a conservative club, where there were already fruit machines. I didn’t think of the significance of this until I was setting up, but I was really glad that I could make the link to the place I was exhibiting. This will in turn help me figure out why I’ll be exhibiting in other places in the future and bring the importance of it into the context and research of my work, something I didn’t necessarily think of doing before. The importance of the work being displayed in the Cathays Conservative Club was that I could then see the paintings where a fruit machine is traditionally placed, which is in the environment of men. The “gamble” of my machines were if the phrases used by people who messaged or commented to either my Tinder profile or on MyFreeCams. The idea was that the correct use of emojis to create the “best” sentence, or the “best” comments” might win the person’s time. On Tinder, I was really intrigued by how this is often played as game to win a “booty call”, just by the right use of emojis. The turning of a fruit machine wheel, replaced by emojis, reflect this game.

Gap Crit Turning Point

For a recent gap crit, I made a small and quick set-up, using this piece below as the surface that the projection of one of my films was cast onto. I wanted to use this opportunity to experiment using all of my films, and see what worked best, especially to see if a film in particular looked interesting as a projected “body” onto the relief figure, or if it would look better if I didn’t try to fit the projection in that way.

I had a few practice runs before my gap crit, and came out with very interesting morphed projections that I was excited to see what people thought of. This was a huge turning point for me and my work, and established exactly how I wanted to project my films form now on during this project.

I also really liked how the sound effects I had used, mostly that of chewing, slurping, cutting, etc, almost made the piece feel more alive in some way. What it did make me want to change was, however, the size of the object I was displaying the films on. The projector projects films in more of a square form, so the ideal piece should also be more square to fit the film better, therefore I made one for the crit to compare the two.


The square worked better, but it still didn’t fit entirely, which I investigated and found the exact measurements for a 4:9 projection.

I then set up the gap crit how I’d like an audience to view my work, which ended up being fairly close to the projection. I wanted this because the video really morphed from the clay on the MDF, and created a more grotesque version of the film, linking to my initial research for these films of Cindy Sherman and ORLAN.

Pictures taken from the crit;

Grotesque Performances, Films, and Images

After researching into Cindy Sherman and ORLAN’s grotesque performance pieces and photography, I was intrigued by why they chose to portray women’s bodies in this way,  producing responses that range from carnal attraction to disgust.

The grotesque, as art historian Frances S. Connelly writes in her book The Grotesque in Western Art and Culture (2012), is “a boundary creature” that “roams the borderland of all that is familiar and conventional.” It is desirous of transformation—an “open mouth that invites our descent into other worlds.” The grotesque, she writes, is inherently associated with the feminine—bodied, earthy, changeful. That thinking has long shaped depictions of the female body, including archetypes of sexual or environmental threat, like prostitutes, femmes fatales, and sorceresses. Even centuries before the term emerged, the ancient Greek philosopher Aristotle “advanced the influential argument that a woman’s body is monstrous by nature, a deviation from that of the normative male”.

My initial playful experimentation looking into online relationships with our emoji use and sexualised foods took a new grotesque form. While it did still adopt a playful side to it, I began experimenting with this when I completed a short film called “Preparation For Sending My Boyfriend a Nude”, which includes myself creating new breasts for myself using clay in the cold, ready to admire in the mirror. They are meant to look like cherries, but end up looking bloodied. This is furthered by the use of a knife, cutting off bits of my new breasts for a more circular shape, then painting with a large wall roller brush, a stereotypical industrial and male item.

Video link;

These emoji images and videos are meant to represent what one would send or create on a social media page. This is what I am meant to try and strive to look like. The clay aspect is for a very hands-on, gritty look, adding to the grotesque imagery. I also wanted to link it to being quite sculptural, perhaps narrating my film with Ovid’s myth of Pygmalion, thus creating a new outlook on the traditional ideal female form, as this one is made by a woman – but still for the male gaze.

After moulding and wetting the clay, I begin putting it on my breasts, almost sensually, but slightly chaotically. They do not look conventionally attractive, and certainly don’t look like cherries, which was my intention. I wanted it to look like I thought they looked attractive on me, even though I had transformed my breasts into something quite monstrous. I do this by looking at myself in the mirror, and remaining emotionless throughout the video, with no shock or disgust on my face; the judging will be made by the male gaze.

As I have previously touched upon, the sexual game we play with casual and/or long-term partners using emojis online is done to win a sexual “prize” at the end of it. At the end of this preparation, I ate a banana, a phallic food object that has certainly been sexualised, with the help of sexting and emojis. This was symbolic for what I hoped to gain from showing my new, morphed body.

I was also inspired by Jean Cocetau’s Orpheus (1950) and the mirror scene. I thought it was perfect for explaining my ideas around fetishisation, as women very often would pose in front of a mirror when taking photos of their bodies, thus linking with the theme of comparing women’s bodies to food. (Photos for reference are below)

The film itself is me putting on gloves that enables me to reach and get fruit from inside of the mirror. This is similar to the Orpheus film, where he uses gloves to travel inside the mirror, which is how I decided to end my film. This is meant to represent the consumption of my own body image in a humerous way.

From my research, I was also inspired by Rachel Maclean’s remake of the Rokeby Venus by Diego Velázquez. I began by lying in the same position, looking directly at the camera through the mirror, eating the grapes on my relief piece slowly, and almost seductively. I then progress into eating a lot at the same time, filling my cheeks, and almost have to spit them out. The juice runs down my chin, as the food overfills my mouth. Consuming what’s meant to represent my body is a direct link to Make Me Up, as the women are all eating the woman who’s lost in a challenge without knowing. Consuming women as a woman myself could both be seen as empowering, as I’m taking that right away from men, but also self-destructive. My aim was to make it look destructive, and make it apparent that these food comparisons aren’t having positive impacts on women, just as the “we are eating each other” references in Make Me Up. However, Maclean uses it in a way that these gruelling tasks put upon women in society means that we end up fighting against each other, thus consume their worth.

The use of “You’re So Vain” is an ironic reference to art historians believing Venus is being vain, even if she isn’t actually looking at herself in the mirror, and amplifies the almost unsettling facial expression on my face. I also progressively slowed the sound right down numerous times for the “so vain” line, which definitely adds to the unsettling nature of the short film.

One of my later films is about eating what you want to look like, as I, the subject, consume myself, as a female who’s consumed by the male gaze. This was done by a performance of myself eating marzipan, and slowly adding more and more marzipan to my face, creating a patch-work of skin-like texture on my face. I keep looking at the camera in an admiring way, again to address how I’m happy with this grotesque outcome, posing as if I’m posing for a photoshoot. I add to the grotesque nature of it by adding the same red paint as I’ve been using throughout these performances, creating a bloodied-skin effect. The aim was to eat up the marzipan, as I’d previously used it to create new breasts and bum.

This reminds me heavily of the masks some murderers are known for creating out of skin in films, such as Texas Chainsaw Massacre, inspired by the hideous murders of women committed by Ed Gein.

leatherface-pretty-woman-mask

“Going Bananas in A Kebab Shop” has now slowly transformed the fruits into more flesh-like objects, resembling the phallus and testicles, which are first made of a kebab consistency (made of marzipan) that are on my breasts. I decided to do this to go against the Biblical story of Eve coming from Adam’s rib, and thought that a male’s anatomy coming from a woman’s breasts would fit this idea perfectly. The Biblical connotations behind fruit are also too obvious to miss, which is why I’m finally delving into them.

The editing was especially fun making this, but quite difficult too, as it’s my longest film yet. It’s done with an ironic YouTube tutorial tone to the editing, with the mashing of the marzipan, the colour mixing, and the shape making. Making the grapes was especially good for this, as I did a voice-over “and then roll in a ball, in a ball, in a ball,..etc” quickly, almost sounding impatient and angry in the end. I also added many new sound effects I’ve recently made, such as slurping drink with moans, which went well with the heavy phallus connotation in the film while making the flesh coloured bananas.

Degree Show Build – Day 5

I didn’t get as much done today as I’d hoped to, as I couldn’t get my hands on a drill over the weekend, therefore I’ll have to wait until Tuesday when the campus is open again. However, I did sort out where exactly my pieces will be on the wall by measuring exactly where the plinths would be positioned (68cm gap between all). I marked all areas with masking tape, which will offer a guide in case anything is moved. I also made sure that all projections on the walls measured the same as the boards, so that they fit perfectly on top and make the pieces look like screens rather than obviously look projected onto.

Degree Show Build – Day 4

I managed to get a lot done today, including all of the rest of the painting (mainly touch-ups), cleaning and scrubbing the floors, and placing most of the equipment inside the plinths.

I began the floor cleaning in sections, working my way around the plinths to make sure I didn’t create any marks with the browned water. Most of the paint was impossible to get off, but I did improve its state, and is looking much better than it previously did.

I also placed the plinths to about where I’ll be wanting them for the show. This lead to starting to carefully place everything inside. However, I did find out that the amplifiers didn’t fit inside, which is a shame, as I was really hoping they would. I also found that I forgot to cut holes into the bottom for the wires to come through and not disturb the plinth by making it wobbly, which is something I’ll have to quickly sort out next week with a tutor’s guidance. However, for now, I have a good idea of where the pieces will be placed, and will start drafting them out on the walls tomorrow.

I also signed up to invigilating during my lunch break for when the show starts for 4 shifts, which will certainly help towards my professional development.

Tomorrow will be for placing the plinths in correct positions, placing masking tape where needed to remember the positioning if they’re moved. I’ll be calculating this by measuring the length of the room, which I quickly did today before having to leave the building. It measures 4 meters and 80cm, and will have to include all of the plinths, which are 35cm in width X 4. This means that I’ll have to subtract 140cm from the room measurement and divide by 5 spaces. This means that there should be roughly 68cm gap between all spaces.

dsc_01261186902572.jpg

Degree Show Build – Day 3

I wanted to concentrate on getting most of the painting done today, including the plinths and walls. In order to do this, I needed to sand the filler down I had used in the morning in preparation for a smoother surface to paint on. The nails I had found under the paint on the walls slowed this process down, as the sanding I did had resurfaced them. This meant that I had to take my time to get them out, but this was difficult due to how deep they all were.

I also had the help of my first year helper, Sadie Mansfield, which was great because she painted a few plinths while I painted my walls, then I helped her finish off the plinths. This meant that the only painting I had left was the touch-ups.

However, I was pleased that I was able to do all of this in a day, which will certainly help me crack on with the curation of the piece next week.

Degree show build – Day 2 / finishing the plinth build

Today was the last day I wanted to commit to building my plinths, therefore finished them after helping with the degree show build in the morning. We first had to create a belt of people moving large and long pieces of wood up the stairs, pointing them upwards as people on the stairs pulled them up. This worked well, however it was still proven to be difficult due to how heavy they were. We then helped James build scaffolding structures to be able to reach the ceiling to remove and add structures for specific pieces, and touched up on the painting that were dark/very colourful, and scrubbed the floors.

My plinths are finally built and sanded down, and will only need filler and painting done next, which I’ll ask my first year helper to help me with (Sadie) to make sure I don’t spend any longer on them while the degree show build is still ongoing. It took me a while to finish them because I needed Nigel’s (the technician) help with cutting my wood, as I wasn’t authorised to use the machine. He was busy helping many people at the same time who are also currently working on their final pieces, which is what caused this long delay.

Plinth Build – Day 2

I concentrated on making the lens holes for my projectors today, and measured exactly where they’d all be, and made sure they were all level with one another. I did, however, come across a slight issue: the projector with the cable inside didn’t fit inside the plinth properly. this meant that I had to cut out another hole for the cable, which will run round to the back of the plinth, and will be taped to the plinth to keep its tidy look. They’re starting to look really great, and I think will look good for the exhibition once everything’s set up. I have really tried to make them to the best of my abilities, and should definitely add to the piece’s overall presentation.

I did also have to make another one, because the plinth I already had just didn’t look as tidy as the one’s I had made, and thought it would stand out if I left it alone. Therefore, I used the rest of the afternoon starting on the fourth.

Plinth building – degree show build

Today was dedicated to building plinths, as I had organised a day with Nigel Williams over the Easter break to get them done before the build began. It was successful and I’ve almost finished 3 plinths after today, and learned a lot while doing them. I noted down all the steps for the next time I needed to build a plinth.

For a plinth that would measure 35cm X 123cm;

32cm sheet of 6mm MDF:

Measure out middle of wood line (thinner strip of wood for inner bit of plinth/where the screws will be put into)
Measure out holes for the screws – around 5 will do
Glue wood on the other side
Turn sheet of MDF over
Clamp the glued wood down
Nail down on one side – can now un-clamp and work up, moving the wood to ensure a flush finish

Repeat on the other 32cm sheet

35cm sheet of 6mm MDF:

Measure out new middle of wood line that has been created from the joining of both of 32cm and 35cm sides
Parallel the screws but slightly to the right to avoid clash with previous screw on 32cm sheet
Do first screw flush before adding glue to this joint
Glue in a zig-zag, covering both MDF and wood strip
Screw in flush, working up

Shelves:

Larger shelf for projector:

Measure inside of plinth for the squared shelf, cut around 2cm squares on all sides. Slot in small pieces of the strip of wood under line measuring 3ft inside plinth (do on all four sides). Use a nail gun to secure these bits. Slot in the shelf.

Half shelf for media player:

Measure one side like the previous shelf, and half of the other side. Repeat steps, but only cut 2cm off one side, and nail gun strips onto side you want the shelf to be on. Glue to secure/add strip of wood under and above with a nail gun.

My next steps are to bring a projector down and cut through the front of the plinth for the lens. I also need to drill holes in the top shelf for ventilation and cabling.

Final Decisions

Today has been all about sorting my films for each projector and finalising curation aspects of my piece, such as choosing which boards I’ll be using. The six I had to choose from were a variation of different fruits – some resembles grotesque versions of the body more, and some looked more life-like, and one was a plain board I was considering using for flashbacks.

dsc_0051-11668693862.jpg
All options to put on the wall

My final thoughts were that I even wante dthe flashbacks to morph as they are projected onto these boards, and felt that the more 3D/relief fruits did this the best. The different positioning of the objects will be interesting to watch when I do a trial run later today using the projectors.

dsc_0053896166912.jpg
Final 4

I find it much easier to know what’s going on with my work by writing everything down in simple diagrams. I did this by drawing quick sketches of the boards I have chosen with names of the films I plan on showing onto them below the diagram. I then made a time-frame of what would happen in all of the films, taking into consideration of what was happening on all projectors at the same time. I planned this out so that no two film with me speaking would clash, and the only sounds that did were sound effects, which would only emphasise the grotesque sounds. There are also periods of flashbacks, images, and colour blocks to help with this. They all last 10 minutes, which also helped me in keeping track with each USB and what was shown on them.

I then decided to label each USB and will also label each media player to help me figure things out much quickly when I’m setting up. Each 10 minute film is now on the USBs ready to try out on the projectors this afternoon.

When I went in to university, I found that only one film would play due to the media players not working. The one that was working was also turning off at random moments, which is worrying, but I think it’s because of the cable being loose therefore it shouldn’t be too hard to fix. However, I did manage to get a few images of one projector on one of my pieces;